- Details
As promised in our last post this time we’re going to cover the new properties we’ve added to the Presentation Server to support the enhanced image capability:
- IMAGEALIGN
- IMAGECOLORKEY
- IMAGEFRAMECOUNT
- IMAGEFRAMENUMBER
- IMAGESIZE
- IMAGESTYLE
- IMAGETRANSLUCENCY
We have also added the following new method:
- SETIMAGE
IMAGEALIGN property
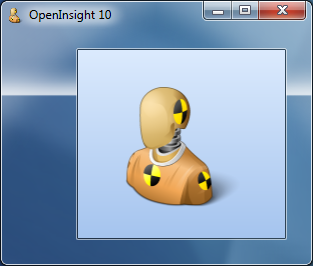
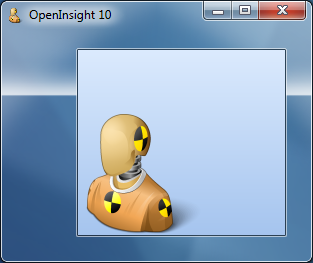
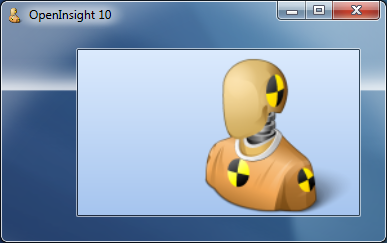
This property specifies how a clipped or scaled image is aligned within a client area. It can be one of the following values:
- “0” Top-Left
- “1” Top-Center
- “2” Top-Right
- “3” Middle-Left
- “4” Centered
- “5” Middle-Right
- “6” Bottom-Left
- “7” Bottom-Center
- “8” Bottom-Right
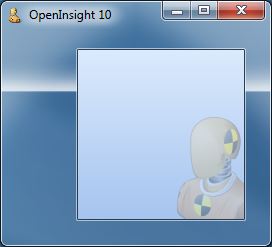
Examples:
IMAGESTYLE property
This property specifies how the image is rendered onto the window’s client area. The following property values are supported:
- “0” Clip – the image is not resized and is simply rendered onto the client area according to the IMAGEALIGN property (Note that the IMAGEORIGIN property will override the image alignment).
- “1” Stretch – the image is resized to cover the entire client area of the window.
- “2” Tile – the image is tiled across the entire client area.
- “3” Scale – the image is resized but it’s proportions are kept constant: e.g. if the image is taller than it is wide the image height will be resized to the height of the client area, and it’s width scaled to keep the same proportions. It will also respect theIMAGEALIGN property.
Examples:
IMAGECOLORKEY property
This property specifies the color to use as the transparent color when rendering the image as described in this post. It basically replaces the current (and undocumented)IMAGETRANSPARENT and TRANSPARENTCOLOR properties, both of which have been deprecated with this release.
This property should be a valid RGB color value or one of the following special values:
- “-1” Use the color of the top left pixel as the color-key.
- “-2” Use the color of the top-right pixel as the color-key.
- “-3” Use the color of the bottom-left pixel as the color-key.
- “-4” Use the color of the bottom-right pixel as the color-key.
- “-5” Do not use any color-keying.
IMAGEFRAMECOUNT property
Some image formats such a GIF and TIFF files can contain more than one image, held in series of frames. This read-only property returns the number of frames in the image file. Note that this is not the same as the IMAGECOUNT property, which applies to a single frame only.
Example:
IMAGEFRAMENUMBER property
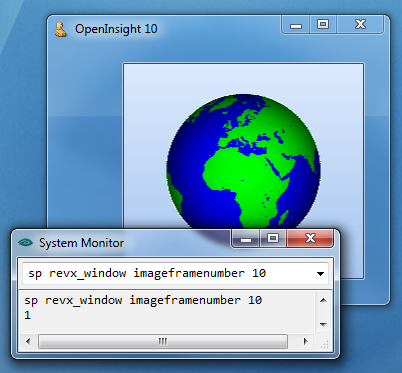
This property gets or sets the current display frame for the image and could be used with a TIMER event to display an animated GIF file for example. Note that this property is not the same as the IMAGENUMBER property which applies to a single frame only.
Examples:
IMAGESIZE property
This read-only property returns a dynamic array containing the size of the image in pixels:
<1> Width
<2> Height
Note that for a multi-frame image format it returns the size of a single frame, not all the frames combined.
IMAGETRANSLUCENCY property
This property specifies the transparency of the entire image as it is rendered onto the window. It is based on simple percentage amount, “0″ being fully opaque and “100″ being fully transparent (and therefore not visible).
Example:
SETIMAGE method
This method supersedes the existing IMAGE property and allows a image to be set by passing the raw image data rather than by passing a file or resource name as per the BITMAP property. The OpenInsight property interface is text-based and does not support passing binary data with embedded null characters, whereas the method interface does, hence the reason for this change.
Other image-related properties
The following current image-related properties remain the same:
- BITMAP
- IMAGECOUNT
- IMAGENUMBER
- IMAGEOFFSET
- IMAGEORIGIN
Deprecated properties
The following properties have been deprecated or removed in OpenInsight 10:
- IMAGE – this property has been superseded by the SETIMAGE method. It is now a synonym for the BITMAP property.
- IMAGECLIP – this property has been superseded by the IMAGESTYLE property.
- IMAGETRANSPARENT – this property has been superseded by the IMAGECOLORKEYproperty.
- TRANSPARENTCOLOR – this property has been superseded by the IMAGECOLORKEYproperty.
(Disclaimer: This article is based on preliminary information and may be subject to change in the final release version of OpenInsight 10).
- Details
In a previous post we looked at some the enhancements to the version 10 System Monitor to make it a more user-friendly tool. However, one of the features we didn’t mention was the addition of a Basic+ property API so you can interact with it from your own programs and tools if you wish. This API is exposed via the new SYSTEMMONITOR object, which supports the following properties:
- HANDLE
- RESULTS
- SIZE
- TEXT
- VISIBLE
And the following method:
- RUN
HANDLE property
This property returns the window handle (HWND) of the System Monitor window.
RESULTS property
This property returns the contents of the results edit box in the System Monitor.
SIZE property
This property gets and sets the size and position of the System Monitor window. It has the same format as the normal OpenInsight WINDOW SIZE property.
TEXT property
This property gets and sets the caption text of the System Monitor window.
VISIBLE property
This property gets and sets the visibility of the System Monitor window. It has the same format as the normal OpenInsight WINDOW VISIBLE property
RUN method
This method executes a system monitor command.
(Disclaimer: This article is based on preliminary information and may be subject to change in the final release version of OpenInsight 10).
- Details
With the increasing popularity of high-resolution monitors, one of the biggest usability problems today is the display size of text and UI controls, because they appear smaller as the screen resolution increases. The recommended advice to overcome this is to increase the DPI (dots-per-inch) setting of the system, thereby enlarging these elements and making them easier to see and read. If you’ve been using Windows Vista and above you’ve probably already seen this Control Panel applet that allows you to easily change your DPI settings:
However, unless an application is designed to be DPI-aware this can result in some unsatisfactory results, such as over-large fonts, clipped controls and blurry windows. This is because many older Windows applications assume a constant DPI (96) when setting font and size coordinates and they do not apply any scaling to these values, thereby resulting in the aforementioned problems.
(NB. The “magic number” of 96 that you’ll see throughout this post is due to the fact that at 96 DPI one logical pixel is equal to one screen pixel – this is the “100%” setting in the Control Panel applet shown above).
In an effort to accommodate these applications Microsoft have introduced a couple of OS features over the years:
- On Windows XP the system fonts and some system UI elements are scaled up at runtime, but this leads to the common problem of text appearing larger and being clipped as the actual size of the bounding control is usually not scaled.
- On Windows Vista and above a feature called “DPI-virtualization” automatically scales windows belonging to an application not marked as “DPI-aware” – in effect they are rendered at 96 DPI to an off-screen bitmap, resized, and then drawn to the screen, but this can result in some blurry windows due to pixel stretching. OpenInsight 10 is marked as a DPI-aware application so will not be subjected to DPI-virtualization.
OpenInsight 10, High-DPI and automatic scaling.
OpenInsight 10 supports High-DPI by automatically scaling-up all GUI objects at runtime when created through the SYSTEM object’s CREATE method (formerly known as the “Utility CREATE service”). This affects the following two properties:
- Size coordinates
- Fonts
The actual scaling for coordinates is calculated by the following simple formula:
screenPixels = logicalPixels * ( currentDPI / 96 )
For example, if you create a control with a size of 200×100 and you are running at 144 DPI (i.e. 150% as per the Control Panel applet above) then the control will be created with an actual size of 300×150 pixels.
The font point size is similarly multiplied by the scaling factor (i.e. currentDPI / 96 ).
Supporting images under High-DPI
Another noticeable issue when running at high DPI settings are images, which are assumed to have been designed for 96 DPI and therefore have to be scaled up at runtime leading to a potential loss of quality due to the resize. To help with this the tool-set has been extended to allow repository BITMAP entities to specify multiple image files when being defined. The first will be used for 96 DPI (100%), the second for up to 120 DPI (125%), the third for up to 144 DPI (150%) the fourth for up to 192 DPI (200%) and so on, with further images being defined at 48 DPI (50%) increments (for future-proofing). When a control is created at runtime the system picks the appropriate image size and scales it as needed (preferably down where possible) before applying any other transformations.
Note that this does NOT apply to images set at runtime in code via the BITMAP property. In this case the developer is assumed to have selected the correct image file size regardless of the DPI setting.
Designing under High-DPI
If you design your forms when running under a High-DPI setting the Form Designer will save and compile all coordinate and font information as though you were developing at 96DPI, so the values will be scaled down appropriately.
Opting out of automatic scaling
Of course, we always try our best not to break existing applications so you can set an option in the RXI file to turn off the automatic DPI scaling if you wish (this option is exposed at runtime via the read-only SYSTEM DPISCALING property).
This same principle can also be applied to individual windows at design-time so you can use it selectively as needed (WINDOW objects also support the read-only DPISCALING property).
Further reading
If you want to find out more information on this topic please see the following link to Microsoft’s documentation on MSDN:
Writing High-DPI Win32 Applications
(Disclaimer: This article is based on preliminary information and may be subject to change in the final release version of OpenInsight 10).
- Details
One of the new capabilities we’ve added to Editline controls in OpenInsight 10 is Autocompletion. This is a common feature found in many modern programs where the system attempts to predict a word or sentence that the user is entering without actually typing it in completely.
To enable this the Editline control now supports the following new properties:
- AUTOCOMPLETEMODE
- AUTOCOMPLETESOURCE
- AUTOCOMPLETELIST
AUTOCOMPLETEMODE property
This property specifies if Autocomplete is active, and if so how the suggested string is displayed. It can be one of the following values:
- “0” – Autocomplete is disabled
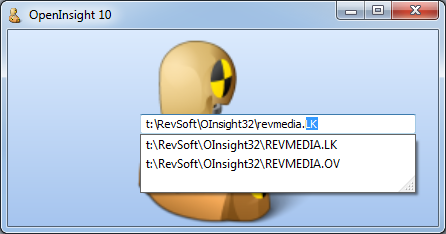
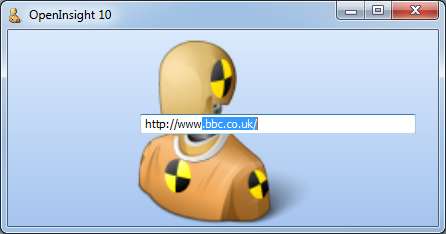
- “1” – Autocomplete is enabled and in “append” mode: the remainder of the suggested string is added to the end of the characters the user has typed in and highlighted.
- “2” – Autocomplete is enabled and in “suggest” mode: the system displays a drop-down list of possible matches to what the user is typing.
- “3” – Autocomplete is enabled and in “suggest-append” mode. This is combination of the previous two modes.
AUTOCOMPLETESOURCE property
This property specifies where the list of possible suggested strings is obtained from. It can be one of the following values:
- “0” – Custom List: a list set via the AUTOCOMPLETELIST property
- “1” – File List: a list of matching file and directory names supplied by Windows
- “2” – Directory List: a list of matching directory names supplied by Windows
- “3” – History List: a list of matches against the user’s URL history list
- “4” – MRU List: a list of matches against the user’s MRU list
- “5” – Shell List: a list of matches against all objects in the Windows Shell Namespace
AUTOCOMPLETELIST property
This property specifies an @fm-delimited list of suggested strings to use when theAUTOCOMPLETESOURCE property is “0”
Examples:
(Disclaimer: This article is based on preliminary information and may be subject to change in the final release version of OpenInsight 10).

